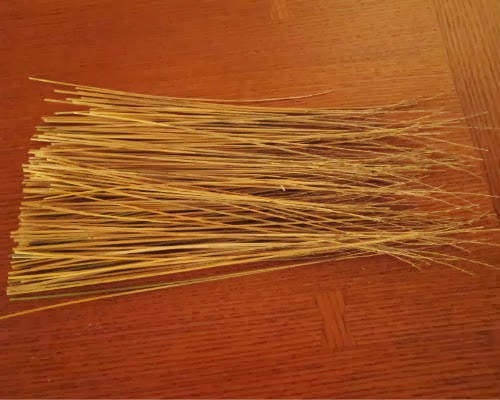
So I visually mowed the city’s lawn looking for the perfect grass to use in these brushes. It takes a lot more grass than I thought it would. And picking off all those grains at the tips was a little annoying. However, it produced a good working brush for hakeme and the effort and sliver were well worth it. If you don’t know what Hakeme is, check out this post!
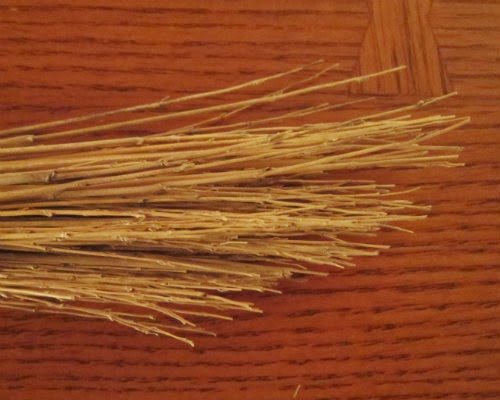
You need to prep the grass by picking off the grains on the ends and cutting the pieces about the same length.
Here it is, step by step:
 |
| Gather the grasses and make sure the tips are on the same side. |
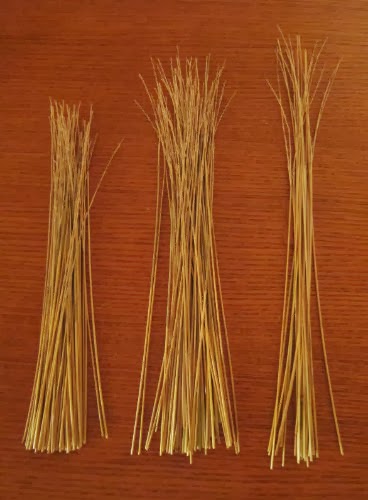 |
| I separated mine into three sizes to help with shaping. |
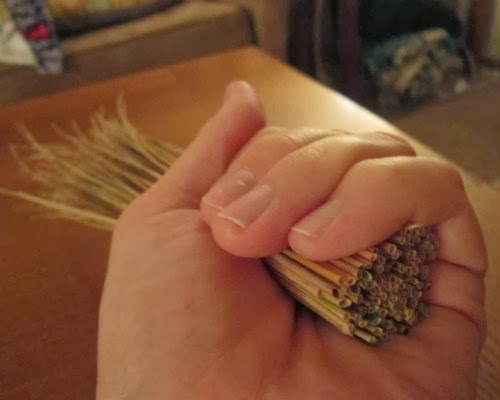 |
| Stack the three piles on top of one another and make the bottom even. |
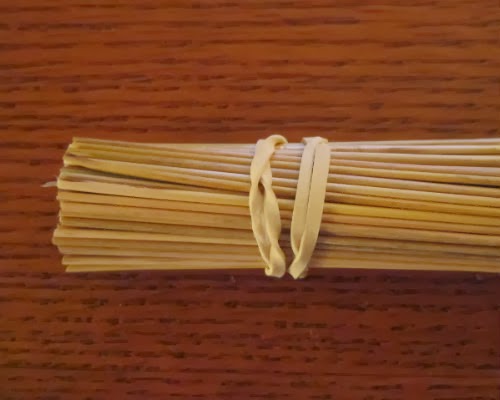 |
| I recommend using a rubber band to keep the pieces in place for wrapping a handle. |
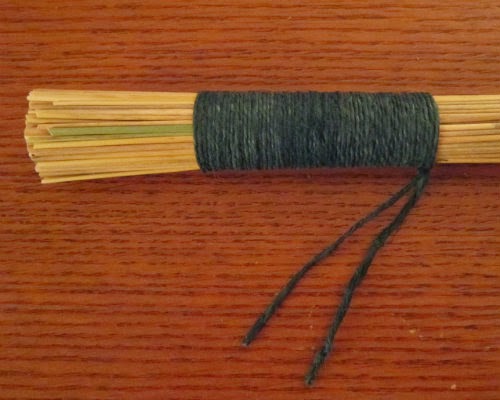 |
| Wrap the grass tightly with string or small rope. I used leftover hemp I had on hand. |
 |
| Trim the ends so the brush looks pleasing to you! |
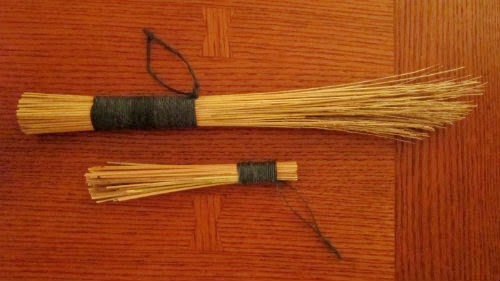 |
| I made two! The extra string length enables me to hang them to dry. |
There! Now you too can make a hakeme brush for your pots! Huzzah!

I used to sweep my house and surrounding dirt with that! Who knew potters used them too.
Oh man, I look for tools everywhere Amanda. I have used broom bristles before for different reasons too! I think found or made (by me) tools lend a sense of personality and history to the pots, in contrast to purchased tools which seem to add a colder, less personal and usually more mechanical sense to the pots.
what grass did you use? thanks for your help
Hi Eve,
I used longer grasses that I found around me, nothing in particular. As long as they were longer and had a thick stem (like a corn broom). Actually, those corn brooms are a great way to make a bunch of different brushes. I would go that route unless you really want to pick your own grasses.