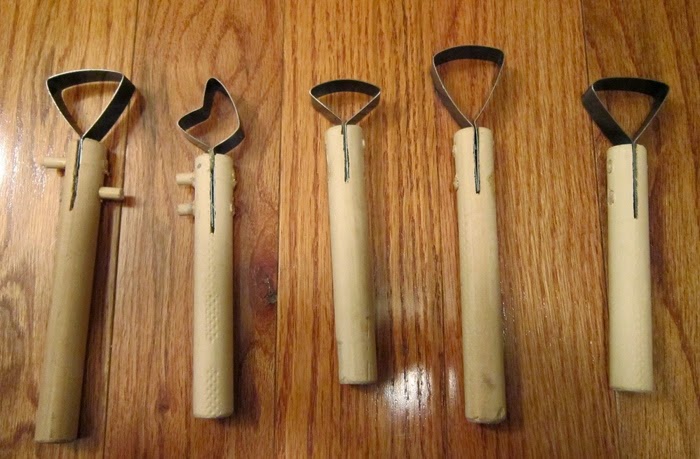
Have you ever wanted to fashion your own trimming tools for trimming your pots? There are many different things you can use to trim clay, but the loop tool design is one of my favorites. This post will show you how I made my own loop tools using some found steel strapping and some wood.
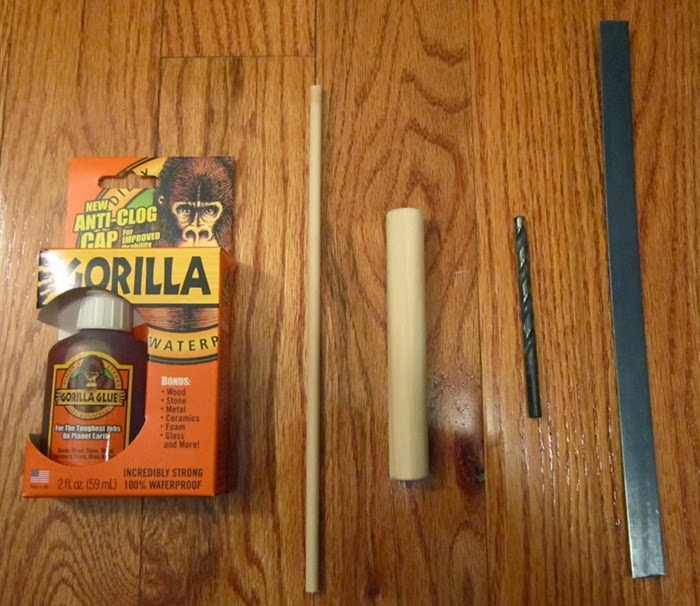
Materials:
- Steel strapping (I found mine in construction garbage from wood packing crates…keep your eyes peeled and you’ll find some somewhere)
- Wood dowel for handle – diameter as thick or slightly thicker than the strapping width
- Wood dowel for in-handle anchors – get it the size of a drill bit you will use
Tools
- Saw
- Wood glue
- Drill and bit
- Pliers or something to help bend strapping
Let’s do this!
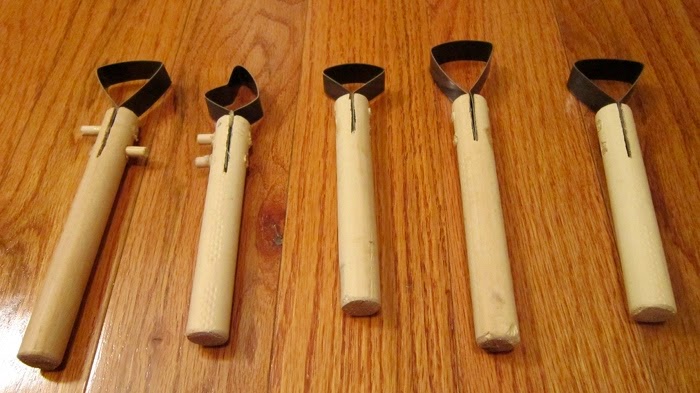
Step 1: Bend your strapping to the shape you please.
- I used a pliers to help bend my strap into different shapes.
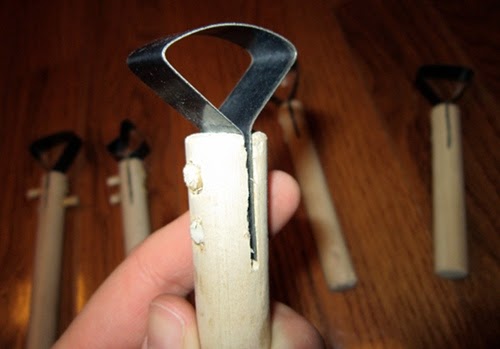
- The simpler the better. I prefer triangular trimming tools.
- Make sure you leave enough metal at the bottom of the strap shape so you can sandwich them together and fit them into the wood handle and drill two holes in to anchor the strap in place.
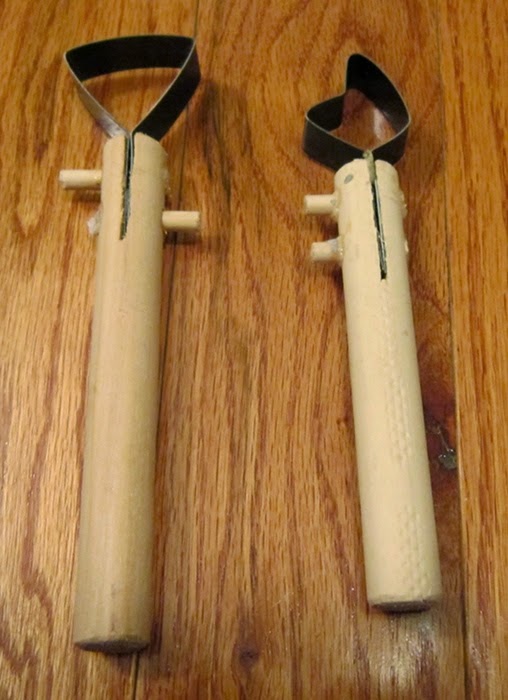
Step 2: Saw a line down the top of the dowel and sandwich the two ends of the strapping into the cut mark.
- Cut deep enough to fully seat the strapping
- Remember to leave enough metal and cut deep enough so you can drill two holes for the anchors
Step 3: Drill two holes through the wood handle and strapping
- I found it was easier if you bound the handle with something like rope or a clamp. This makes it move less when drilling
- Drill all the way through both the handle and the strapping inside.
- I drilled my holes on top and below one another. If you have enough strapping, I bet three holes would anchor the trimming tool even better than two. Just sayin.
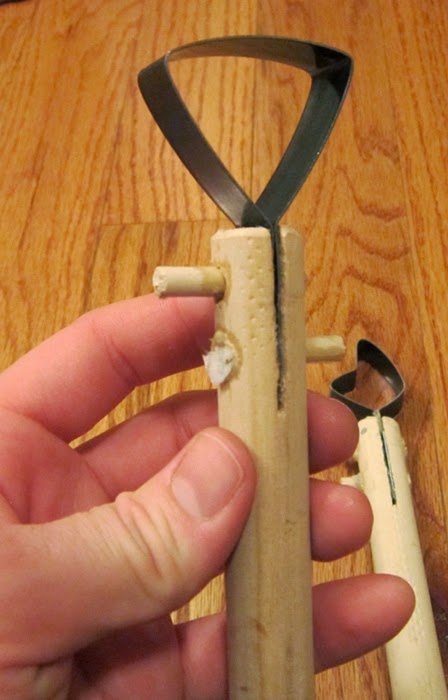
Step 4: Glue small dowel anchors into place
- I found this easiest if the smaller anchor dowels were pre-cut to an already small length
- I used Gorilla glue as that is what I had. Feel free to use any wood glue or epoxy, whatever you have on hand. Better make sure it is waterproof though.
- If using Gorilla glue, don’t forget the part about adding water to the surfaces for optimal bonding!

Step 5: Set time, sanding, and finishing
- Allow the glue to set up and harden according to the package instructions
- Cut off any large anchor dowels hanging out and sand the whole handle smooth to your liking.
- If you want, apply a finish to your piece. I used a spray polyurethane, but you could use anything from mineral oil to paint. I happened to have poly on hand which made my choice easy. You can leave it raw if you want too, it will just get stained from clay and not look as nice.
- If you have a grinder or stone sharpener, feel free to grind away a bevel on the outside of the strapping on both edges. It’s okay if you don’t though, it will still trim clay, and will trim wetter clay better than drier clay.
Afterthoughts:
- Easy to make and a lot of fun!
- Leave enough space for cleaning the tool out with your fingers in the corners…
- While you can make a bunch for around $15 total in glue, wood, and finish costs, these tools are not nearly as well made as something like a Dolan Tool which happens to be my favorite and they are only $10 each.
- The metal doesn’t stay sharp for very long
- The wide width of the metal strapping is annoying with clay build-up
- Apart from these caveats, it is fun to make your own tools and I believe that the tools you make yourself can help add even more “you” flavor to your work.
- I found a tree branch the thickness of the metal and made some gorgeous handles by carving them with a knife. Get creative!
Good luck everyone and have a blast!
PS – I posted this a while back but lost the old blog due to moving my website around. I am reposting this to fulfill a request from a viewer.